Fitting a brake light warning system
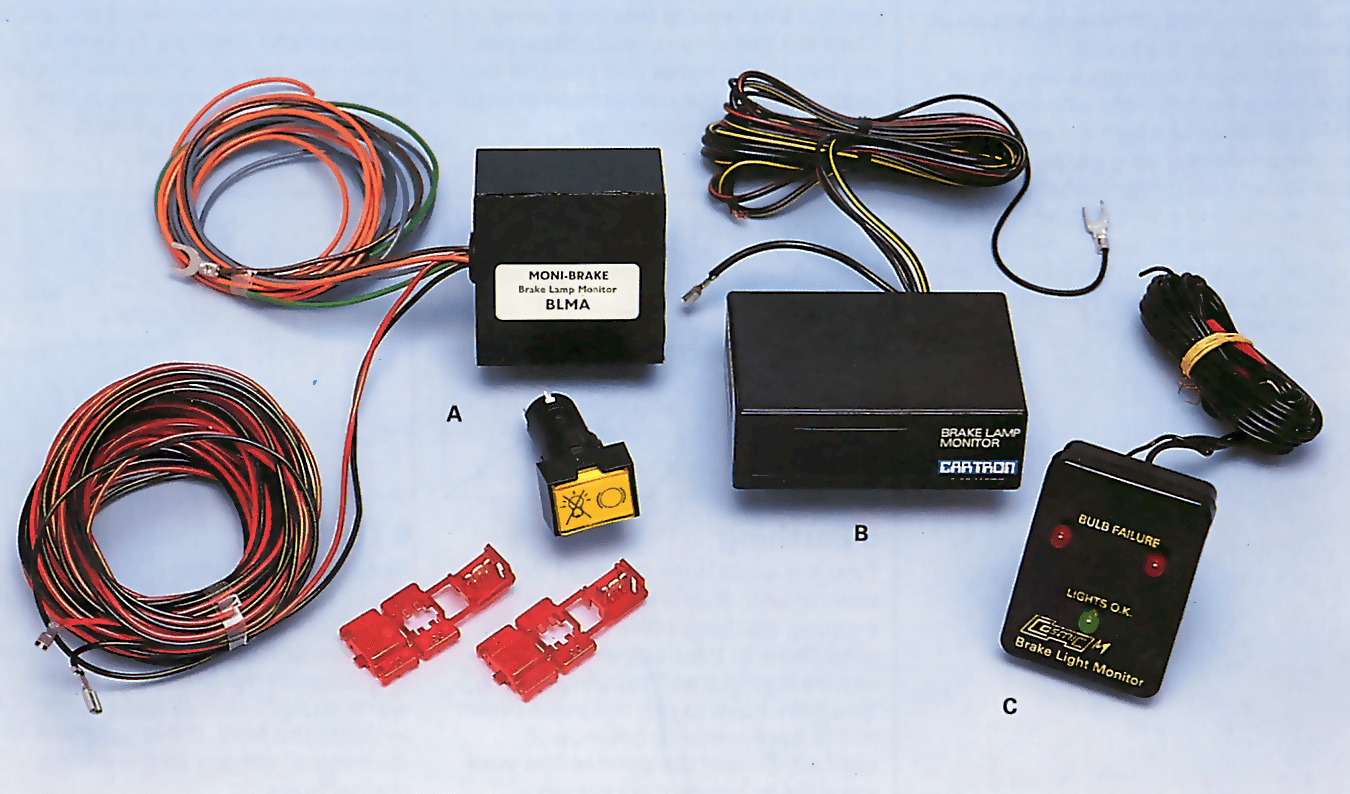
You can find a variety of brake light monitors in car accessory shops. Monitor A has a separate control box and warning light. Monitor B has its control box and warning light combined and the unit is mounted on the dash. Monitor C has three warning lights that are also combined with the control box which is mounted on the dash. One of these lights indicates the brake circuit is okay while the other two warn of a fault.
Brake lights are a vital warning signal to other road-users and a legal
requirement, so you need to make sure they are always in working order. You
should check them every day but, because this is awkward to do on your own,
they are often checked only rarely if at all.
One easy way to keep an eye on your brake lights is to fit a brake light
warning unit. This monitors the current used by the brake light circuit. If one
or both lights blow, or there is a poor earth contact somewhere in the circuit,
or a wire becomes disconnected, there will be a drop in the amount of current
used and the unit will illuminate a warning light mounted on the dash. It’s a
worthwhile, and relatively cheap, safety feature.
Warning lights
As usual there are a variety of kits to choose from and you need to check
the various units to see what features they include and how the prices
compare.
For example, some types just have a single warning light that illuminates
when there is a fault in the brake light circuit. Others are fitted with two
lights, one of which acts as a systems check and illuminates every time the
pedal is pressed to indicate that the circuit is okay. The other light –
usually red glows to indicate there is a fault in the circuit.
Some monitors also have a self-checking feature. Every time the ignition is
turned on the warning light glows for a few seconds to indicate that the
monitor itself is working.
Fitting
Some units have a small warning display panel that is simply stuck to the
dash surface with a self-adhesive pad. Others have a separate control unit and
light.
With the latter type you can fit the control unit near to the brake lights
at the rear of the car and mount the warning light on the dash itself or in a
bracket secured to the dash.
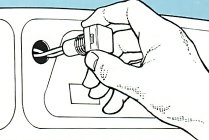
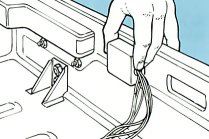
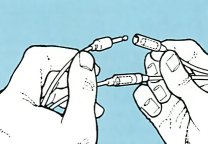
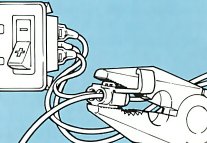
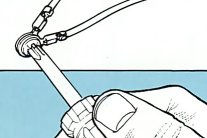
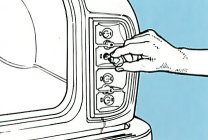
Disconnect the battery. If the warning light is to be mounted on the dash, find a suitable position and drill out a hole for it. If it is mounted in a bracket to the underside of the dash, drill two holes and secure the bracket with self-tapping screws. Then fit the warning light to the bracket. The monitor control box is mounted inside the boot near to the rear brake lights using a self-adhesive pad. Remove any trims or covers from around the rear lights. Find a location near to the main brake-light feed wire, then remove the backing paper from the adhesive pad and press firmly into position. Disconnect the main brake-light feed wire from the brake lights. Refer to the kit, and connect the appropriate control box wire to this feed wire. Then cut the wire running between the two brake lights and join the two loose ends to the two grey or orange wires from the control box. Route the two warning light wires back from the control box, under the carpets, to the warning light. Join the two wires to the two terminals on the warning light. Using a Scotchlok connector, tap a further wire into the red warning-light-to-control-box wire, then join this to a fused, ignition-controlled feed. Find the earth wire attached to the control unit. Run it either to an existing earthing point or drill a small hole in the bodywork and secure it with a self-tapping screw. You may have to rub the paint down to the bare metal to get a good contact. Smear the connection with vaseline to prevent corrosion.
Reconnect the battery. Turn on the ignition and the warning light should illuminate for a few seconds. Remove one of the brake light bulbs and depress the brake pedal —the warning light should light up to indicate the fault. If the light fails to illuminate recheck all the wiring.