Working on the wiring system
Use a circuit tester to check if single wires are damaged.
The wiring loom itself seldom goes wrong, but after other repairs have been made, a cable may be trapped and its insulation cut through, causing a short circuit.
If this does not blow a fuse the wiring overheats and melts insulation, perhaps starting a fire. A similar result can come from fitting accessories incorrectly, or if power demand is too high for the size of the wire being used.
After many years, insulation may become hard and brittle, particularly where it is exposed to heat, as in the engine bay. Sections, or all of the loom, may need replacing.
The damage caused by overheated wires is easy to find; but if only a single wire has overheated and melted at some point, you may have to use a circuit tester to find the break.
If the damage is in an open run of wiring, you may be able to mend separate wires without taking out a section of the loom.
If it is in any part of the covered sections, you need to remove at least part of the wiring loom.
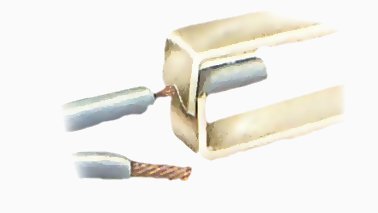
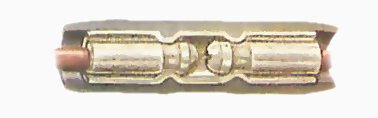
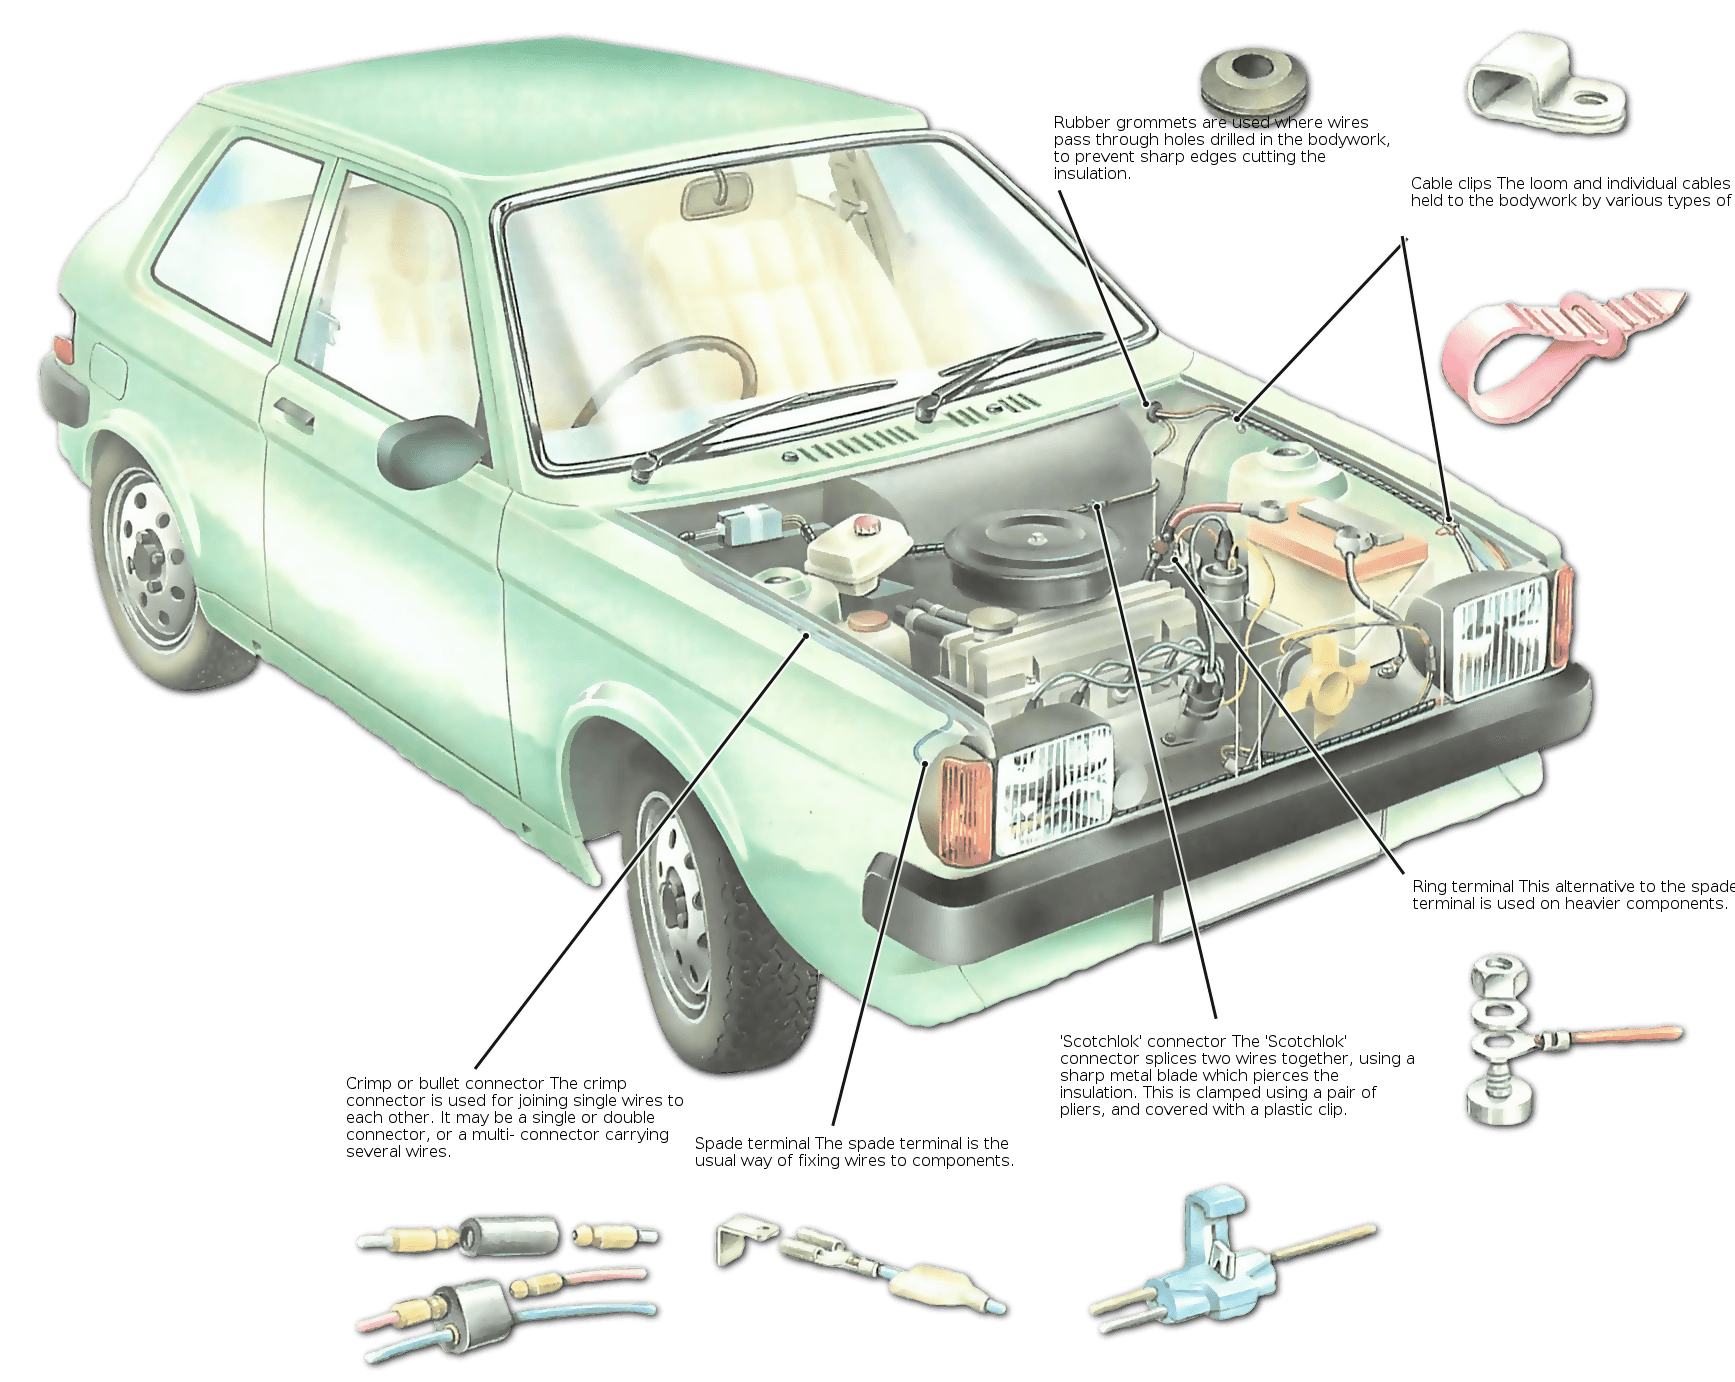
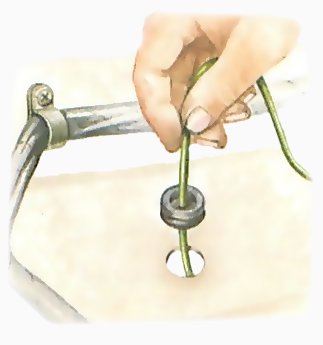
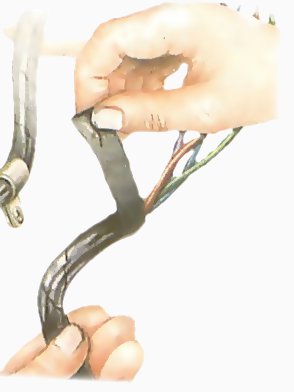
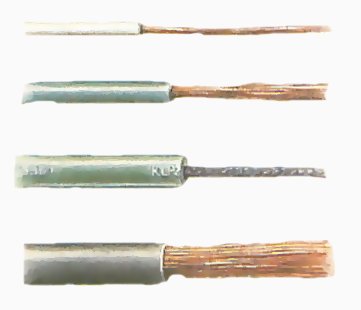
Label wires before cutting them when working on a section of the loom. Before you disconnect anything, make absolutely sure you know how to put it back. Number both sides of each connection with labels made of masking tape. If necessary, make drawings of cable routes and how clips fit. Use a craft knife or razor blade to cut away the wrapping from the damaged section. Take care not to cut into the plastic cable insulation. Even if only one wire has overheated, inspect all the others to make sure their insulation is not damaged. Before cutting out damaged wires, make sure that the colour coding is the same at each end of the damaged section of each wire, and that it is not so discoloured that it is unrecognisable. If there is any chance of confusion, label both ends. Cut out all the damaged wires with wire cutters. Spread out the cuts across a bundle of several wires: if many joins are opposite each other their bulk may make it difficult to fit the loom into the car. If possible, replace wiring with new wire of the same colour. The new wire must be the right size: there are five sizes, depending on current rating. Repairs in wrapped sections of the loom are the only places where you may join wires by twisting them together and soldering the joint mainly because there may not be room for any other method. If possible, use an insulated in-line crimp connector. Test each mended wire with a circuit tester and battery, connected to the nearest connectors either side of the mend. Re-wrap the exposed section of the loom with self-adhesive or ‘clingfilm’ PVC insulating tape. Put some layers between the exposed section and adjoining wires – not merely a cover over the top – then fit the loom back into the car. Reconnect all terminals and clips, then test all the electrical components involved. If an outlying part of the loom with few wires has been damaged, it may be simpler to replace each wire to the end of the loom instead of inserting a section. If so, use the old, damaged wire as a guide to the length of the new. In an open area of wiring, join old and new with snap connectors. Fit a rubber grommet when passing wires through a new hole in the bodywork. When you fit accessories you must use large enough cables. As far as you can, route the new wiring along the course of the existing loom, using the same clips and grommets. Push a screwdriver blade through the grommet carefully to enlarge it for the new cables, taking care not to damage insulation on existing wires. If you pass a cable through a new hole, fit the hole with a grommet. To pass wires up door pillars or behind trim, tape them to a piece of fairly stiff wire, poke it carefully behind the trim or up the pillar, and pull it through at the far end, bringing the wire with it. Use insulating tape in a spiral to bind wires together. If you have to lead a new wire along a difficult route – to the rear of the car, for example – you could take the opportunity to lead a spare wire at the same time, for any accessory you might want to fit later. Cover the end of a spare wire with insulating tape to prevent an electrical short circuit. 14/30 cable 65/30 cable High-tension (HT) lead The starter cable Cable sizes are given by two numbers. The first one is the number of strands. The second (which is always the same in car wiring) is the diameter of each strand in millimetres. Twist bare ends together and solder them.Cover the joint with insulating tape. Tag connectors are closedround the bare wire withpliers, then soldered. A spade terminal is easy to disconnect andreconnect. To connect two wires, use a wire stripper to remove about in. (19 mm) of insulation from each wire. Twist the bare ends together, then use pliers to press the twisted section into a compact shape. Solder the wires together so that they cannot be pulled apart, using only a little solder to avoid making the joint bulky. Wind insulating tape in a spiral over the joint. To fit a spade terminal, slip the insulating cover over the wire and push it up the wire, out of the way. Use a wire stripper to remove about 1/8in. (3 mm) of insulation from the end of the wire. Lay the bare strands in the inner section of the connector. Use crimping pliers to tighten the two small tongues firmly around the insulated part of the wire. On the other side of the connector, push the wire strands back and down flat. Hold the connector blade upwards to avoid solder running into the spade part. Solder the wire to the connector with just enough solder to secure all the strands. Let the connector cool before sliding the cover back. Remove insulation with a wire stripper. Use a wire stripper to remove about 3/8 in. (10 mm) of insulation from the end of the wire. Push the wire into the connector so that the strands just protrude from the round end. Grip the cable, connector uppermost, in a vice or self-locking pliers, so that the connector rests on top of the vice and cannot slide down the wire when soldering. Inside a bullet connector. Apply solder on the top of the connector, and let it melt and run down inside. Trim off the protruding strands with wire cutters.
Fitting new wiring
Identifying cable sizes
Twisting wires together and fitting spade terminals
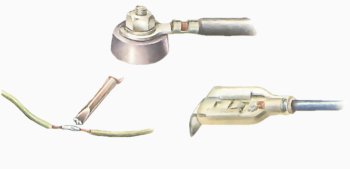
Fitting a bullet connector