
Replacing lever-arm dampers
The damper may sit upright and be bolted to the inner wing or to the front bulkhead. The arm operates through a slot in the inner wing. The damper may also be fixed under the wing, to a chassis member or subframe, and operate through a series of links.
A lever-arm damper on the front often acts as part of the suspension unit.
Loosen the front wheel nuts, jack up the front of the car, place axle stands under the chassis members and chock the rear wheels. Remove the front wheels.
Put the jack under the bottom suspension arm on one side. Raise the jack to push the arm up and to take the weight off the damper arm.
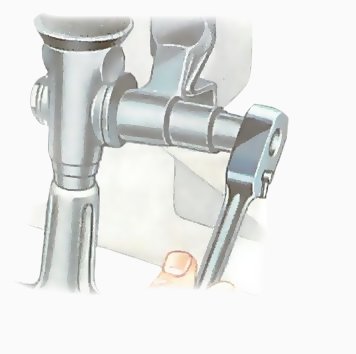
The steering arm may be in the way. If so, free it using a ball-joint separator; you may be able to hire a scissor type.
Alternatively, it may be possible to separate the joint by a sharp hammer blow. Unscrew the nut until it just covers about three or four threads at the end of the ball-joint pin. Hit it with a soft-faced hammer in order to break the seat. When the joint is free, separate the two parts and move the steering arm out of the way.
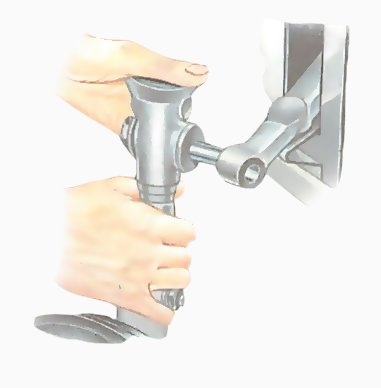
Undo and remove the bolt that fixes the lever-arm damper to the steering swivel (or stub axle). The damper body may be bolted to a chassis member, subframe or the inner wing. Undo the fixing bolts, and lift it away.
Rear damper
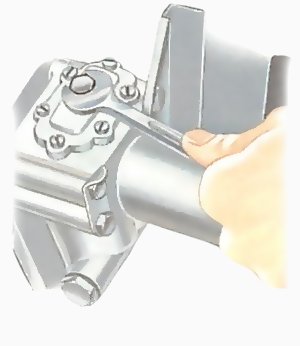
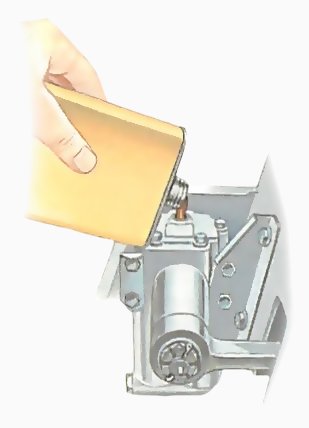
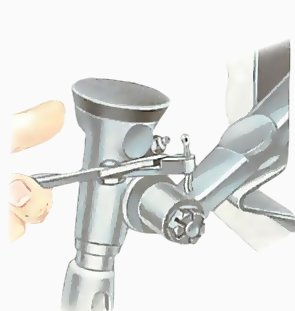
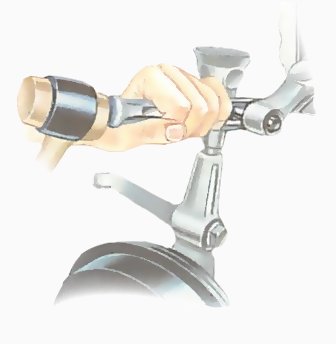
The damper is usually bolted to a reinforced part of the inner wing and may operate via a link rod. The rear lever-arm damper is a separate part of the suspension. There is generally no need to disturb the rest of the rear suspension. Loosen the rear wheel nuts, jack up the back of the car and place axle stands under the chassis members. Chock the front wheels. Remove the rear wheels. Undo and remove the nut and bolt which holds the damper arm to the connecting link. Undo the damper fixing bolts and lift away. The filler plug is on the top. Wipe around the area to clean off road grime. Remove the filler plug with a spanner or large-bladed screwdriver. Top up with damper fluid specified by the manufacturer. A lot of topping up means a leak; replace the damper. Brush off grime. Remove the filler cap when the area is free from dirt. Top up with the specified damper fluid. The lever arm may be secured to the top swivel by a castellated nut and split pin. Remove the pin with pliers and undo the nut. Use a ball-joint separator to free the arm from the tapered mounting pin, and pull the whole assembly clear. Undo the bolts holding the damper to the chassis. Fit the new damper in reverse order of removal. Straighten the split-pin legs and remove with pliers. Fit a new split pin when reassembling the joint. Use a socket or ring spanner to remove the castellated nut. Separate the arm from the mounting pin. Here a fork-type separator and soft-faced hammer are being used. When the joint is free, pull the swivel assembly clear of the lever arm. Undoing a damper fixing bolt. Some have nuts as well and need two spanners. The damper fixing bolts may screw into captive nuts on the chassis or wing, or there may be bolts with nuts on the other side, in which case two spanners are needed.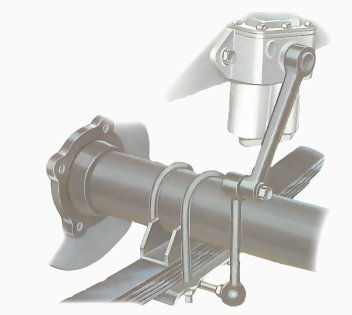
How to top up a damper

Renewing a front lever-arm damper
Damper fixed to chassis member
